
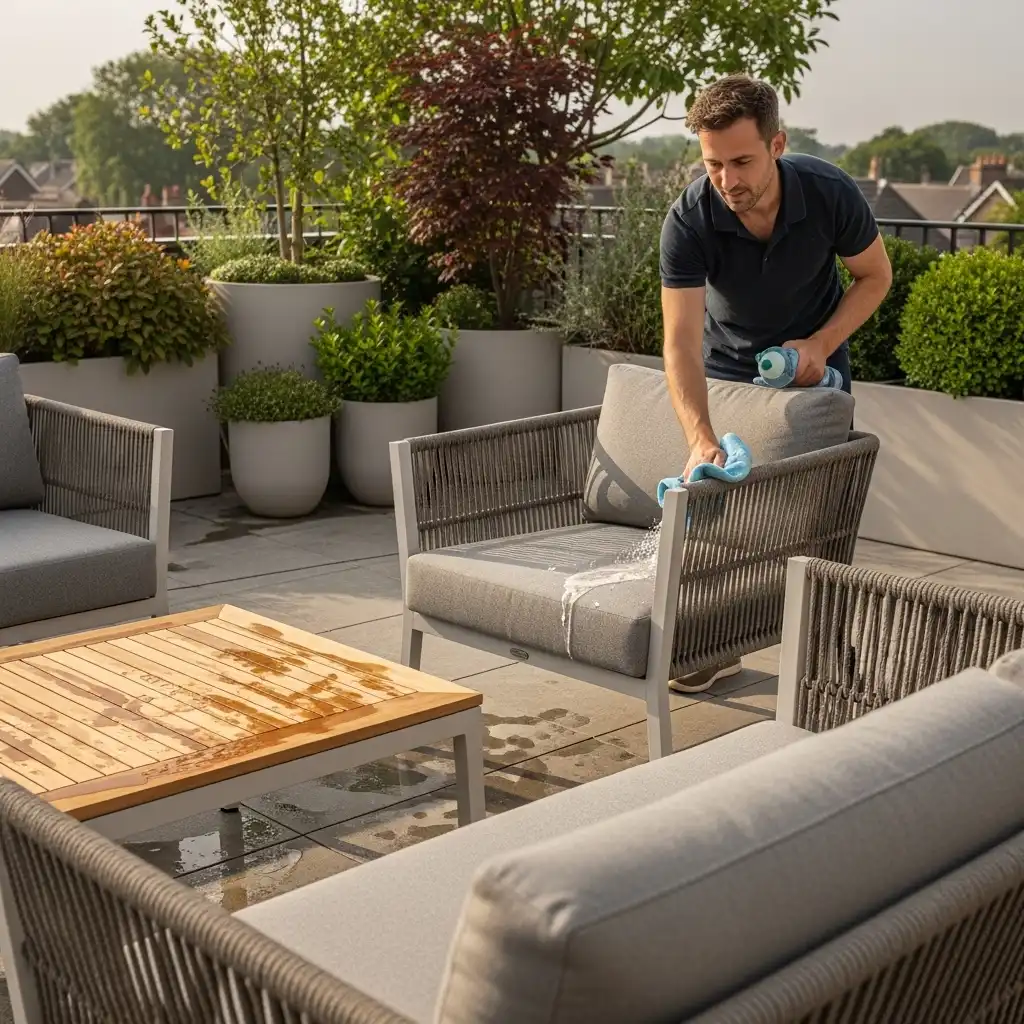
How to Clean Garden Furniture: A Step-by-Step Guide
If your patio, balcony, or garden seating is starting to look worn, this guide explains how to clean garden furniture properly without damaging the finish. It’s for homeowners who want outdoor furniture care to stay simple and low-stress, not complicated, whether the set is teak, aluminium, rattan, composite, or includes cushioned pieces.
A good clean does more than make furniture look better. It also helps protect what you paid for, and it can often help pieces last longer too. In many cases, that means less need for strong products and less risk of replacing items sooner than expected. That likely matters even more now, with the global outdoor furniture market expected to reach USD 58.91 billion in 2026 and 65% of consumers prioritizing low-maintenance furniture. As more people invest in outdoor living, they usually want furniture that keeps looking good on patios, balconies, and in gardens without becoming hard work to maintain.
This step-by-step tutorial covers the tools to gather, how to prepare the area, and the safe way to wash different materials. It also includes cushions, stains, and simple ways to keep everything looking good between deeper cleans, which in most cases saves time later. For anyone with premium outdoor pieces, including weather-resistant designs like those from Rengard trendy outdoor furniture , these steps show an easy, practical way to care for them without making the whole job harder than it needs to be.
Before You Start to Clean Garden Furniture: What You’ll Need
It often helps to get everything together first, because the job usually goes faster that way. In most cases, you only need a fairly simple setup.
- Garden hose or bucket of clean water
- Mild soap mixed with lukewarm water
- 2 to 3 soft microfibre cloths
- Soft sponge
- Soft-bristle brush
- Small detailing brush, or an old soft toothbrush, for woven areas
- Dry towels
- Vacuum with brush attachment for cushions and crevices
- Optional: teak-safe cleaner for stubborn marks on teak
- Optional: furniture covers for after cleaning
Some items are best avoided unless your furniture maker clearly says they’re safe, so check first:
- Bleach
- Strong detergent
- Wire brushes
- Pressure washers at close range
- Abrasive pads
- Solvent-based cleaners
For outdoor furniture, a basic soap-and-water clean is often enough, which keeps things simple. That matches common care advice and usually works for all-weather pieces made for British conditions, so there’s often no need to use anything harsher.
Step 1: Check the Furniture Material and Care Label
Before cleaning anything, it helps to figure out what material you actually have. That usually matters more than people think. Teak, powder-coated aluminium, synthetic rattan, composite finishes, and outdoor fabrics all need slightly different care.
You can often find a care label or note under the seat, along the table frame, or on the cushion cover. If there is nothing there, the material itself will usually give a fairly clear clue:
- Teak: natural wood with visible grain
- Aluminium: lightweight metal, often with a powder-coated finish
- Synthetic rattan: woven plastic-style strands over a frame
- Composite or HDPE-style surfaces: smooth, solid panels that are usually low-maintenance
- Outdoor fabric cushions: covers may be removable, or they may stay fixed
A lot of premium garden furniture is made to stay outdoors all year, especially with modern finishes and weather-ready materials. Even so, regular cleaning often helps keep everything in good condition, especially through wetter months. Is your set teak? Then it helps to know that silver-grey weathering is normal and not a problem on its own. In most cases, that change in colour does not mean the wood is damaged.
| Material | Best Cleaning Method | Main Risk To Avoid |
|---|---|---|
| Teak | Mild soap, water, soft-bristle brush | Harsh scrubbing across the grain |
| Powder-coated aluminium | Soft cloth, mild soap, rinse well | Abrasive pads that dull coating |
| Synthetic rattan | Brush crevices, gentle soapy wipe | Strong chemicals that dry out weave |
| Composite or HDPE | Soap and water, soft sponge | Solvents or rough scourers |
| Outdoor cushions | Vacuum, spot clean, washable covers if allowed | Storing damp covers |
If you need more help with specific materials later, that’s covered here: Outdoor Aluminium Furniture Care: How to Keep It Looking New for frame care and finish protection.
Step 2: Remove Loose Dirt First When You Clean Garden Furniture
Start dry. People skip this step all the time when cleaning outdoor furniture, but it often helps more than you might think.
Brush or wipe off:
- Leaves
- Dust
- Pollen
- Bird mess
- Cobwebs
- Crumbs
- Loose soil from plant pots
For cushions, a vacuum with a brush attachment works well. Woven rattan is usually easier to clean with a soft detailing brush, especially between the strands. On slatted teak tables, dirt often gathers in the joins, so brush out the narrow gaps between the slats.
It may seem small, but adding water too soon can turn loose grit into muddy streaks. Once scrubbing begins, that same grit can work a bit like sandpaper and scratch the surface, which is better to avoid.
Tip: If the furniture is on a small balcony, put a dust sheet or an old towel underneath before brushing. Cleanup is easier that way, and it also helps stop dirt spreading across the floor or into nearby corners. For compact layouts, Maximizing Space: Modular Outdoor Furniture for Small Gardens also covers useful ideas for easier outdoor upkeep.
Common mistake: Cleaning in full hot sun. Soap can dry too quickly and may leave marks, so a mild, dry day is usually a better choice, or a shady spot if possible.

Step 3: Mix a Safe Cleaning Solution
Now it’s time to make the cleaner. In most cases, all you need is:
- 1 bucket of lukewarm water
- A small amount of mild soap
The water should feel warm, not hot, and that detail matters. Hot water can put stress on some fabrics and protective coatings. If possible, use a gentle, non-detergent soap. A mild soap solution is often recommended for outdoor sets because it can remove everyday dirt without stripping the finish.
Stronger products usually aren’t worth risking. They can fade cushion fabrics, damage powder coating, or dry out woven materials, which is frustrating. They also add extra chemicals to your outdoor space for no real reason.
Truly eco-friendly outdoor furniture should: 1. Be made from high-percentage post-consumer recycled materials, 2. Last decades without replacement, 3. Require zero chemical maintenance, 4. Be recyclable at end of life, 5. Come from a transparent manufacturer with verifiable claims.
The same general approach applies to cleaning too. In my view, a gentler routine is easier on outdoor furniture and probably better for the environment as well.
Step 4: Wash Frames and Hard Surfaces One Section at a Time
Dip a soft sponge or cloth into the soapy water, then wring it out until it’s damp, not dripping, and clean one small section at a time (nice and easy). This usually helps stop dirt from getting spread around as you clean garden furniture.
Follow this order:
- Start with the top surfaces
- Move on to armrests and tabletops
- Next, clean the seat frames
- Finish with the legs and lower rails
For most all-weather pieces, a light rinse with a garden hose or a second wipe with clean water after washing both work well. Then dry everything with a towel so water doesn’t sit on the surface.
For aluminium frames
Use a soft cloth with soapy water, nothing harsh. Then rinse well and dry it fully, which helps prevent water spots.
For composite or HDPE-style surfaces
Use the same soap-and-water method. These surfaces are usually pretty easy to care for, which is nice. They usually don’t need sealing, painting, or waterproofing. Very simple overall.
For stone, ceramic, or glass tabletops
A soft cloth usually works better here than a rough brush, and it really helps the surface keep looking right. Then rinse it and buff it dry so streaks do not show. It is a simple step, but in most cases it really does help.
Troubleshooting:
- Still seeing greasy marks? Wipe the surface again with fresh water and a clean cloth.
- If white spots show up, they are usually dried soap or mineral marks, which is very common. Wipe again with plain water, then dry it right away for a quick fix.
Step 5: Clean Teak Carefully and With the Grain
Teak usually needs a lighter touch than many people expect. The goal here is to remove dirt, mildew, and marks without damaging the wood surface, which can happen more easily than it seems. It sounds simple, but it really matters.
Use these exact actions:
- Wet the teak lightly with clean water.
- Dip a soft-bristle brush into your mild soapy solution.
- Scrub gently with the grain. Don’t go across it.
- Pay extra attention to stained areas, arm tops, and table edges.
- Rinse with clean water.
- Dry with a towel, then let it air-dry fully after that.
If dirt is still there, use a teak-safe cleaner made for outdoor furniture. Test it first on a small hidden area, since that is often a good idea before treating the whole piece.
Based on teak care guidance from editorial experts, seasonal cleaning is usually enough for regular upkeep. Most of the time, there is no real need to clean it more often unless the furniture is exposed to heavy dirt or damp conditions. Teak also often changes from golden brown to silver-grey over time. That is a natural aging process, not a sign that the furniture has failed.
Wood remains a major category in outdoor living, with 65.70% market share for wood materials in 2024, so proper teak care matters in plenty of households. For anyone with teak furniture at home, that helps explain why this kind of upkeep often matters more than people think.
For a closer look at aging, finish, and upkeep, see this: The Truth About Teak Garden Furniture UK: Durability & Care Guide.
Common mistake: Using a pressure washer too close to teak. This can rough up the grain and leave the surface fuzzy, and it can happen fast.
Step 6: Brush and Wipe Woven Rattan or Rope Areas
Synthetic rattan and other woven outdoor seating often hold dirt in corners and between the strands. If you only wipe the outside surface, the furniture can still look dusty deeper in the weave, and that is easy to miss.
Try this method instead:
- Start with a dry, soft brush to loosen dirt from the weave.
- If needed, vacuum up the loose debris.
- Use a cloth or soft brush dipped in soapy water, then clean gently between the strands.
- Rinse lightly with clean water or wipe with a damp cloth, then dry with a towel.
An old soft toothbrush is very handy for tight spots around joints. It usually works better there than trying to fit in a larger brush.
Many modern woven sets are made with weather-resistant synthetic fibres over powder-coated aluminium frames. They are easier to care for than natural wicker, but they still usually need gentle cleaning to keep them looking good. For more woven seating ideas, Rattan Garden Furniture: Transform Your Outdoor Space explains how different styles work in outdoor areas.
Tip: Turn chairs or footstools slightly as you clean. You will often spot dirt hiding on the inner sides, under the edges, and around the base. Those areas are often where dust builds up the most.
Common mistake: Leaving woven sections wet for too long. Extra water can collect inside the frame or under cushions, especially near the base, so it is better to clean lightly and dry as you go.
Step 7: Clean Cushions and Fabric Covers Properly
Cushions can really change how the whole set looks, so handling them with care is usually worth it.
Start by checking if the covers come off. Many premium outdoor cushions have zip-off covers, which makes cleaning much easier. If the care label says machine washing is okay, use a gentle cycle with mild detergent and let them air-dry completely. It may be tempting to hurry this step, but letting them dry fully usually makes a difference.
If the covers are not removable:
- Vacuum both sides first.
- Spot clean marks with a cloth and mild soapy water.
- Dab instead of scrubbing hard.
- Rinse the cloth in clean water, then blot away the soap.
- Stand cushions upright so they dry in moving air.
One easy thing to miss: do not store or cover cushions while they are still damp. That often causes musty smells and mildew, especially on shaded patios and city balconies, where moisture tends to hang around longer.
Cleaning them properly really helps. Keeping both fabrics and frames in good shape also reduces waste, so they probably will not need replacing earlier than necessary.
Step 8: Treat Stains, Mildew, and Sticky Marks Early
If you notice a mark, it usually helps to deal with it early. Fresh stains are often much easier to remove than older ones, so waiting too long can make things harder later.
For food and drink spills
Blot first, since that usually helps. Then wash with mild, soapy water, rinse, and you’re likely good.
For bird mess or tree sap
For bird mess or tree sap, place a damp cloth over the spot for a few minutes so it softens. Then wipe it off gently, and don’t scrub too hard.
For light mildew on hard surfaces
For light mildew on hard surfaces, a soft brush with soapy water usually works well. Rinse well, then dry it so you don’t leave moisture.
For stubborn teak stains
For stubborn teak stains, it’s usually best to start with the basic stuff, since regular washing often does the trick. Only use a teak-specific cleaner if that simple method doesn’t work.
Industry data says traditional wood furniture can cost $200 to $400 per year to maintain, so regular cleaning may save you money and help you avoid bigger restoration work later, which can get expensive fast.
If easy-care living matters, it helps to choose materials made for lower upkeep. Some modern alternatives can last 50+ years and may need little more than soap-and-water cleaning, which is often much simpler day to day.
Step 9: Rinse, Dry, and Check for Missed Areas When You Clean Garden Furniture
Once everything is clean, rinse away any soap still left behind. Residue often shows up later, so it is worth checking that the surface is completely clear.
Then dry each part properly:
- Metal frames with a microfibre cloth
- Teak with a clean towel
- Woven sections with a towel, then let them air dry
- Cushions stood upright so air can move around them fully
After that, check over the furniture from a few different angles. You will often notice easy-to-miss spots this way, especially the undersides of armrests, back rails, leg bases, table edges, and the inner side of woven corners.
It is also a good time to catch early signs of wear, such as loose feet, scratched coatings, or cracked glides. Cleaning often helps show small problems before they turn into more expensive repairs, especially when you notice them early.
For more ideas on choosing pieces that stay stylish and need less upkeep, that is covered here: Best Weather-Resistant Outdoor Furniture for UK Gardens. You can also read Protect Outdoor Furniture UK: How to Handle Harsh British Weather for seasonal protection advice.
Step 10: Set a Simple Routine to Clean Garden Furniture and Keep Up
Usually, the best outdoor furniture care plan is just the one that feels realistic enough to stick with.
A simple schedule like this is easy to follow:
- Weekly: do a quick wipe-down and brush-off
- Monthly: use mild soap to clean frames and tabletops
- Seasonally: give teak, woven areas, and cushion covers a deeper clean
- After storms or pollen season: rinse and dry everything so build-up doesn’t settle
If your space is small, a compact cleaning kit can make balcony care much easier, especially in a tight area. Keep it in a lidded box with a cloth, brush, soap, and gloves, so quick cleanups feel simple and easier to keep up with.
How to Verify Success
You’ve cleaned your garden furniture properly if:
- Surfaces feel smooth, not gritty
- No soap film is left behind
- Cushions smell fresh, which often helps, and feel dry
- Woven areas look free of dust, including in the corners
- Teak looks clean without rough damage to the grain
- Aluminium and tabletops dry without streaks, which is usually a good sign
Now Keep It Looking Good
To keep your furniture in great shape, brush off debris often, wipe up spills quickly, and use covers only when everything is fully dry, since that detail is easy to miss. Simple stuff, really. A gentle routine is usually all it takes. In many cases, a hose rinse or a sponge with lukewarm soapy water can clean up common food and drink stains, along with plant or animal mess, without much trouble.
Cleaning garden furniture the right way helps protect its comfort, style, and value. It also helps create a more sustainable outdoor space, since well-made pieces often last longer with regular care. Why not start with one set this weekend? Following the steps in order should leave the outdoor area looking fresher by the end of the day, and the change will probably be easy to see. For longer-term upkeep, The Ultimate Seasonal Outdoor Furniture Maintenance Checklist offers extra maintenance ideas through the year.





One Comment