

garden furniture cleaning Guide Like a Pro
Keeping a patio, balcony, or garden seating area looking expensive over the years usually comes down to a good cleaning routine. This guide is for anyone with outdoor furniture made from teak, aluminium, rattan, composite, rope, or outdoor fabric who wants something simple, safe, and easy to keep up with. No fuss, really. It explains how to clean garden furniture without damaging premium finishes, fading cushions, or losing a whole weekend doing it.
Outdoor living has become a serious home investment, and the wider market is still growing. At the same time, 42% of consumers say cleaning and caring for furnishings is the biggest barrier to improving their outdoor space. If dusty chairs, green staining, or marked cushions have ever made you think, “I’ll sort it later,” you’re definitely not the only one. It builds up fast, and it happens more easily than most people expect.
Inside this tutorial, you’ll find what to gather, how to check each material, how to wash everything the right way, and what to do after cleaning to help protect it. It also covers common mistakes and easy upkeep for both large gardens and small city balconies. The result is a routine that helps furniture stay stylish, feel easy to manage, and stay ready for guests whenever needed.
Before you start: What you’ll need for garden furniture cleaning
Get everything together before you begin, and the whole job usually feels much easier. It also saves you from looking around for things halfway through.
- Soft brush or a soft broom
- Bucket of warm water
- Mild washing-up liquid or gentle soap
- Microfibre cloths
- Soft sponge
- Garden hose, or a jug of clean water
- Spray bottle
- Dry towels
- Vacuum with a brush attachment for cushions and woven areas
- Teak cleaner for stubborn teak stains
- Small toothbrush or detailing brush for corners
- Outdoor furniture covers for storage after cleaning
If your set has cushions, unzip any removable covers first and check the care label before cleaning. If you need a hand once your set is unpacked or moved back into place, this Garden Furniture Assembly Guide: Step-by-Step Installation can help you put everything back properly after a detailed clean, especially if a few pieces have been moved around.
Step 1: Check the material before you clean anything
Before any spraying, scrubbing, or soaking begins, it helps to know what the furniture is actually made of. That simple check can prevent a lot of damage and save some frustration later.
Teak usually does best with gentle washing and, in some cases, a specialist teak cleaner. Powder-coated aluminium is fairly low-maintenance, though abrasive pads can leave scratches on the finish. Synthetic rattan should be cleaned with care and rinsed well. Composite and HDPE-style surfaces are easy enough to look after, but harsh solvents are still best avoided. Outdoor rope and fabric cushions need light cleaning and enough drying time to help prevent mildew.
Frequent cleaning is essential to prevent the buildup of dirt, debris, and stains. Sweep your patio regularly to remove leaves, twigs, and other debris. For deeper cleaning, use a mild soap and water solution, and avoid harsh chemicals that can damage the material.
Easy-care furniture is clearly popular. In a 2025 trend report, 67% of shoppers said practicality and durability matter more than style alone, and 59% planned to buy new outdoor furniture or accessories. Even so, premium furniture still benefits from a practical care routine.
| Outdoor living stat | Value | Why it matters |
|---|---|---|
| Consumers planning to buy outdoor furniture or accessories | 59% | More homes are investing in outdoor spaces |
| Consumers prioritising practicality and durability | 67% | Low-maintenance care matters |
| People held back by cleaning and care | 42% | Simple routines remove a common barrier |
Knowing the material first makes the whole job easier. It gives a better idea of what to use and what to avoid, rather than cleaning by guesswork.
Step 2: Remove loose dirt, leaves, dust, and surface grime
Start with everything dry, not wet. That keeps the job quicker and stops a simple clean from turning into a messy one.
Brush down tabletops, arms, chair legs, and seat frames first. Textured areas usually need a little more attention, so for woven rattan, rope details, cushion seams, and similar spots, a vacuum with a brush attachment helps a lot. Don’t forget to lift the cushions and clean underneath too. If the furniture is on a balcony or small patio, moving planters or side tables out of the way first makes it much easier to reach every edge.
Exact actions:
- Use a soft broom or brush to sweep away leaves and dust.
- Vacuum woven or textured parts on low suction.
- Shake loose dirt from cushions away from the furniture.
- Wipe metal frames and tabletops with a dry microfibre cloth.
- Check hidden areas where grime builds up, like under armrests, around feet, and between weave lines.
A common mistake is spraying water onto dirty furniture right away. Dry dirt quickly turns into muddy streaks, and grime can get pushed deeper into woven surfaces and fabric piping, which just creates more work.
Tip: If you spot flaking finish, cracked joints, or broken weave, stop and inspect the piece before washing it. Cleaning will not fix damage. If you are unsure whether it makes more sense to repair or replace a piece, that is covered here: Garden Furniture Repair: Fix or Replace? before you go any further.
For homeowners comparing materials before starting a garden furniture cleaning routine, this guide to Durable Garden Furniture for Families in North Wales explains which options are easiest to maintain over time.
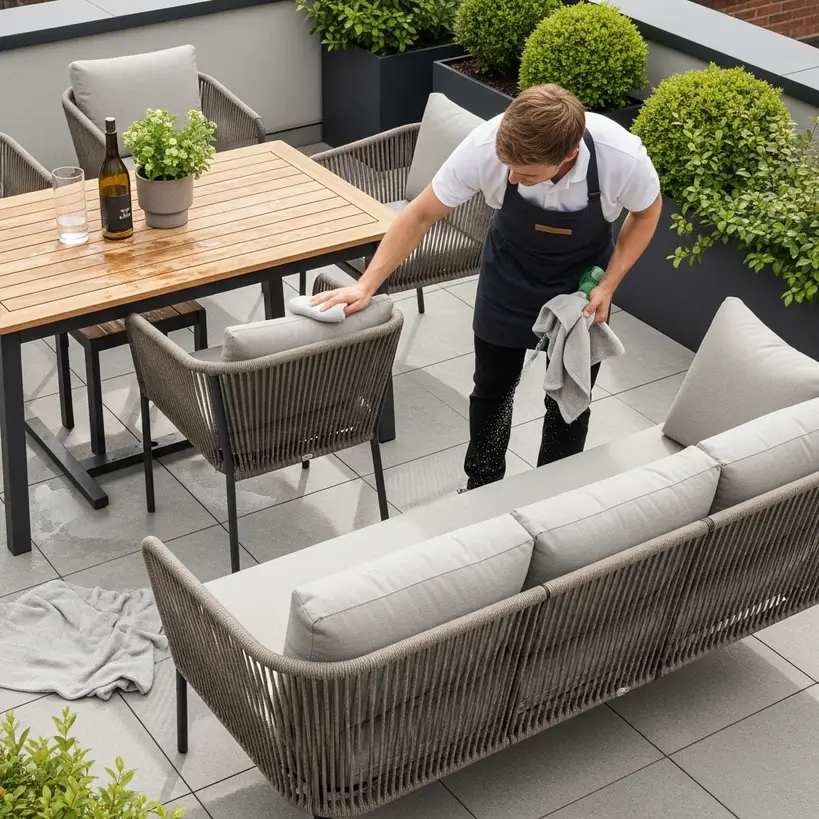
Step 3: Mix a safe cleaning solution and test a small area
Start by mixing the main cleaning solution. For most outdoor furniture, 1 litre of warm water plus 1 to 2 teaspoons of mild washing-up liquid is enough. Stir it gently, and avoid bleach, strong degreasers, and abrasive cream cleaners.
Before you clean everything, test a hidden spot. Spray or dab a little onto the area, wait 5 minutes, then wipe it dry. Check carefully for fading, streaks, or any sticky residue.
This extra step matters most with premium furniture, because different materials often sit next to each other. A luxury sofa set may combine a rust-free aluminium frame with weather-resistant rope detail and thick showerproof cushions. A dining set might use UV-resistant rattan with an aluminium base. A harsh cleaner can react in different ways on each surface, and that is often how damage begins.
Experts usually point to mild soap and water as the safest place to start. Consumer testing and outdoor living guides also warn against harsher chemicals, especially on powder-coated frames and modern woven details, where finishes, coatings, and fabrics may be easier to damage.
If possible, keep two buckets nearby: one for soapy water and one for clean rinse water. This helps you avoid spreading dirty water back over the furniture, which means less re-cleaning too.
Troubleshooting: If the furniture feels chalky after the test, the soap mix is probably too strong or the surface has not been rinsed properly. Make the solution weaker and test again.
Step 4: Garden furniture cleaning for teak without damaging the wood
Teak looks great, lasts well, and benefits from a little care. Some premium pieces stay in good shape for decades. Research even suggests Grade A teak can last up to 50 years outdoors when it’s well maintained. Regular cleaning helps protect that long-term value, which makes the effort feel well worth it.
For everyday cleaning, use a soft brush or sponge with your mild soap mix and scrub with the grain. It helps to clean one section at a time, starting with the tabletop before moving to the arms, legs, and lower frame. Rinse gently with clean water, then wipe away any standing water with a towel. If possible, let it dry in the shade. Nice and easy.
Darker stains, food marks, or weathered areas need a teak cleaner, used exactly as the label says. Keep it on the teak only, away from nearby fabric or metal. A soft brush is still the right choice here. Skip the wire brush.
Common mistakes to avoid:
- Pressure washing teak at close range
- Scrubbing across the grain
- Using bleach to remove black spots
- Oiling dirty teak before cleaning it first
If teak turns silver-grey, that’s normal weathering, not a sign that anything has gone wrong. A lot of owners actually like that finish. Cleaning still helps it stay fresh, but trying to bring it back to a new honey colour usually only makes sense if a full restoration is already planned.
Step 5: Wash aluminium, rattan, composite, and rope without damage
Modern outdoor sets are usually easy to care for, but they still need the right cleaning method. Many stylish sets use rust-free aluminium frames because they stay lightweight and hold up well outdoors, which is a big plus. Synthetic rattan over aluminium is common too, and with proper cleaning it handles rain and frost really well.
For powder-coated aluminium, use a sponge dipped in your soap mix, then rinse with clean water and dry it with a microfibre cloth. Corners need a bit of extra attention, since pollen and dust build up there fast. Anyone considering new sets can also compare materials in this guide to Aluminium Garden Furniture Cheshire: Reliable for UK Weather.
For synthetic rattan, a soft brush or even a toothbrush works well for lifting dirt from the weave. Clean it gently in circular motions, then rinse lightly so no soap stays trapped between the strands.
For composite or HDPE-style surfaces, mild soap and warm water are enough. Rinse well, then dry the surface. These materials are low-maintenance and hold up well outdoors, so cleaning them is usually quite straightforward.
For olefin rope or woven accents, it helps to dab instead of soaking. Use a cloth with your soap mix, then wipe again with clean water. Just avoid leaving the material too wet.
Furniture made from teak, recycled plastic, or powder-coated aluminum requires little maintenance compared to other outdoor furniture materials.
That easy-care quality is a big reason many homeowners choose these materials, especially in busy homes and smaller urban outdoor spaces where cleaning needs to stay simple.
Step 6: Clean cushions and fabric covers carefully
Cushions are one of the first things guests notice, so they stand out right away. They’re also a common place for mildew to form if they stay damp too long.
Start by vacuuming both sides with a brush attachment. If the covers unzip, take them off and check the care label. If machine washing is allowed, wash them on a gentle cycle with cool or lukewarm water and a mild detergent. Then let them air dry fully before putting them back on (the extra time really is worth it).
If the covers can’t be removed:
- Mix a mild soap solution.
- Dip a sponge into it, then wring it out well.
- Blot stains instead of scrubbing hard.
- Wipe the area with a cloth dampened in clean water.
- Stand the cushions on their edge until fully dry.
Don’t store cushions if they’re even a little damp. That can cause smells, mildew, or stains, and those issues are much harder to fix later.
Tip: Drying time is part of cleaning, so a breezy day can help. At the same time, don’t leave wet fabric in strong direct sun for hours, because that can stress some colours over time.
For buyers who want less upkeep, solution-dyed and showerproof outdoor fabrics can make things easier (they reduce some of the hassle). Even so, they still need cleaning and regular care to keep that premium look. For extra advice on weather protection and materials, this article on Is Waterproof Garden Furniture Worth It? is also useful.
Step 7: Rinse, dry, and protect everything for longer life
Getting that polished finish doesn’t end with washing. Drying everything the right way and adding the right protection makes a real difference if the furniture is going to stay in good shape.
Make sure all soap residue is rinsed off. Leftover soap can attract dirt and leave surfaces looking dull. Metal and composite areas should be wiped with a clean cloth, while woven sections and fabrics need time to air dry fully before any covers go back on. That part is really worth the wait.
Then add a few simple protective steps:
- Store cushions indoors or in a dry space when they won’t be used for a while
- Choose breathable outdoor furniture covers instead of airtight plastic sheeting
- Lift furniture slightly off very wet ground where possible
- Clean off bird droppings, pollen, and food spills quickly
- Keep up with light cleaning every 2 to 4 weeks during peak season
Sustainability is also part of long-term value here. The global outdoor furniture market is still large and continues to grow, and more buyers are choosing durable materials that hold up over time. Taking care of furniture properly means replacing it less often and keeping premium materials in use for longer. That helps cut down on waste and also suits eco-conscious homeowners, as well as people who simply like well-made pieces.
A good example is furniture made with rust-free aluminium frames, weather-resistant wicker, composite finishes, and low-maintenance WPC and HDPE-style surfaces. Brands such as Rengard trendy outdoor furniture focus on materials like these because they support stylish outdoor living and need less upkeep over time, which makes owning them easier.
People refreshing their patio setup after a deep garden furniture cleaning session may also find ideas in Stylish Garden Furniture Ideas for Cheshire Homes in 2026.
How to know the job is done well
You can usually tell the job was done properly by how the furniture feels and looks. Surfaces should feel smooth, not sticky, and the fabric should smell fresh, not musty (that part’s easy to notice). In woven areas, there shouldn’t be bits caught in the gaps, and after everything has dried, there shouldn’t be any soap streaks left behind. Teak should look even and clean, not fuzzy from being scrubbed too hard. Aluminium should dry cleanly without cloudy patches, and cushions need to be dry all the way through, not just on the surface (not only the top layer).
Once that’s sorted, the routine can stay simple. A quick dry brush once a week helps, then a light wash every few weeks during the warmer months. It also helps to do a deeper clean at the start of the season and again at the end. For anyone in a flat with a balcony, this can take less than 30 minutes if it’s kept up regularly.
A good garden furniture cleaning routine stays simple and regular. Use the right tools, match the method to the material, avoid harsh chemicals, and make sure everything dries properly. That keeps the outdoor space looking welcoming and tidy, whether it’s for long lunches, quiet mornings, or last-minute guests (which is always handy).